目录
根据jetson ai lab的了解,这里再实战一下yolo的部署,jetson ai lab提供了具体方法,本文主要是实践
ultralytics on jetson
根据官网的指引,其安装方法也是通过容器,非常简单,如下即可
t=ultralytics/ultralytics:latest-jetson-jetpack6
sudo docker pull $t && sudo docker run -it --ipc=host --runtime=nvidia $t
待运行完成之后,默认已经在容器的bash中了,可以直接测试验证,这边以CLI作为例子实践如下。
导出tensorrt模型
# yolo export model=yolov8n.pt format=engine
此时运行日志如下
Creating new Ultralytics Settings v0.0.6 file ✅
View Ultralytics Settings with 'yolo settings' or at '/root/.config/Ultralytics/settings.json'
Update Settings with 'yolo settings key=value', i.e. 'yolo settings runs_dir=path/to/dir'. For help see https://docs.ultralytics.com/quickstart/#ultralytics-settings.
Downloading https://github.com/ultralytics/assets/releases/download/v8.3.0/yolov8n.pt to 'yolov8n.pt': 100% ━━━━━━━━━━━━ 6.2MB 15.4MB/s 0.4s
WARNING ⚠️ TensorRT requires GPU export, automatically assigning device=0
Ultralytics 8.3.198 🚀 Python-3.10.12 torch-2.5.0a0+872d972e41.nv24.08 CUDA:0 (Orin, 7620MiB)
YOLOv8n summary (fused): 72 layers, 3,151,904 parameters, 0 gradients, 8.7 GFLOPs

PyTorch: starting from 'yolov8n.pt' with input shape (1, 3, 640, 640) BCHW and output shape(s) (1, 84, 8400) (6.2 MB)
requirements: Ultralytics requirement ['onnxslim>=0.1.67'] not found, attempting AutoUpdate...
ERROR: pip's dependency resolver does not currently take into account all the packages that are installed. This behaviour is the source of the following dependency conflicts.
torch 2.5.0a0+872d972e41.nv24.8 requires sympy==1.13.1; python_version >= "3.9", but you have sympy 1.14.0 which is incompatible.
WARNING: Running pip as the 'root' user can result in broken permissions and conflicting behaviour with the system package manager, possibly rendering your system unusable. It is recommended to use a virtual environment instead: https://pip.pypa.io/warnings/venv. Use the --root-user-action option if you know what you are doing and want to suppress this warning.
Collecting onnxslim>=0.1.67
  Downloading onnxslim-0.1.68-py3-none-any.whl.metadata (7.6 kB)
Requirement already satisfied: onnx in /usr/local/lib/python3.10/dist-packages (from onnxslim>=0.1.67) (1.19.0)
Collecting sympy>=1.13.3 (from onnxslim>=0.1.67)
  Downloading sympy-1.14.0-py3-none-any.whl.metadata (12 kB)
Requirement already satisfied: packaging in /usr/local/lib/python3.10/dist-packages (from onnxslim>=0.1.67) (20.9)
Collecting colorama (from onnxslim>=0.1.67)
  Downloading colorama-0.4.6-py2.py3-none-any.whl.metadata (17 kB)
Requirement already satisfied: ml_dtypes in /usr/local/lib/python3.10/dist-packages (from onnxslim>=0.1.67) (0.5.3)
Requirement already satisfied: mpmath<1.4,>=1.1.0 in /usr/local/lib/python3.10/dist-packages (from sympy>=1.13.3->onnxslim>=0.1.67) (1.3.0)
Requirement already satisfied: numpy>=1.21 in /usr/local/lib/python3.10/dist-packages (from ml_dtypes->onnxslim>=0.1.67) (1.26.4)
Requirement already satisfied: protobuf>=4.25.1 in /usr/local/lib/python3.10/dist-packages (from onnx->onnxslim>=0.1.67) (5.29.5)
Requirement already satisfied: typing_extensions>=4.7.1 in /usr/local/lib/python3.10/dist-packages (from onnx->onnxslim>=0.1.67) (4.15.0)
Requirement already satisfied: pyparsing>=2.0.2 in /usr/local/lib/python3.10/dist-packages (from packaging->onnxslim>=0.1.67) (3.2.3)
Downloading onnxslim-0.1.68-py3-none-any.whl (164 kB)
Downloading sympy-1.14.0-py3-none-any.whl (6.3 MB)
   ━━━━━━━━━━━━━━━━━━━━━━━━━━━━━━━━━━━━━━━━ 6.3/6.3 MB 1.9 MB/s  0:00:03
Downloading colorama-0.4.6-py2.py3-none-any.whl (25 kB)
Installing collected packages: sympy, colorama, onnxslim
  Attempting uninstall: sympy
    Found existing installation: sympy 1.13.1
    Uninstalling sympy-1.13.1:
      Successfully uninstalled sympy-1.13.1

Successfully installed colorama-0.4.6 onnxslim-0.1.68 sympy-1.14.0

requirements: AutoUpdate success ✅ 16.1s
WARNING ⚠️ requirements: Restart runtime or rerun command for updates to take effect


ONNX: starting export with onnx 1.19.0 opset 19...
ONNX: slimming with onnxslim 0.1.68...
ONNX: export success ✅ 18.9s, saved as 'yolov8n.onnx' (12.2 MB)

TensorRT: starting export with TensorRT 10.3.0...
[09/11/2025-02:15:50] [TRT] [I] [MemUsageChange] Init CUDA: CPU +2, GPU +0, now: CPU 627, GPU 2981 (MiB)
[09/11/2025-02:15:52] [TRT] [I] [MemUsageChange] Init builder kernel library: CPU +927, GPU +1196, now: CPU 1597, GPU 4209 (MiB)
[09/11/2025-02:15:52] [TRT] [I] ----------------------------------------------------------------
[09/11/2025-02:15:52] [TRT] [I] Input filename:   yolov8n.onnx
[09/11/2025-02:15:52] [TRT] [I] ONNX IR version:  0.0.9
[09/11/2025-02:15:52] [TRT] [I] Opset version:    19
[09/11/2025-02:15:52] [TRT] [I] Producer name:    pytorch
[09/11/2025-02:15:52] [TRT] [I] Producer version: 2.5.0
[09/11/2025-02:15:52] [TRT] [I] Domain:
[09/11/2025-02:15:52] [TRT] [I] Model version:    0
[09/11/2025-02:15:52] [TRT] [I] Doc string:
[09/11/2025-02:15:52] [TRT] [I] ----------------------------------------------------------------
TensorRT: input "images" with shape(1, 3, 640, 640) DataType.FLOAT
TensorRT: output "output0" with shape(1, 84, 8400) DataType.FLOAT
TensorRT: building FP32 engine as yolov8n.engine
[09/11/2025-02:15:52] [TRT] [I] Local timing cache in use. Profiling results in this builder pass will not be stored.

[09/11/2025-02:18:36] [TRT] [I] Detected 1 inputs and 3 output network tensors.
[09/11/2025-02:18:37] [TRT] [I] Total Host Persistent Memory: 389248
[09/11/2025-02:18:37] [TRT] [I] Total Device Persistent Memory: 0
[09/11/2025-02:18:37] [TRT] [I] Total Scratch Memory: 0
[09/11/2025-02:18:37] [TRT] [I] [BlockAssignment] Started assigning block shifts. This will take 164 steps to complete.
[09/11/2025-02:18:37] [TRT] [I] [BlockAssignment] Algorithm ShiftNTopDown took 12.5611ms to assign 7 blocks to 164 nodes requiring 18841600 bytes.
[09/11/2025-02:18:37] [TRT] [I] Total Activation Memory: 18841600
[09/11/2025-02:18:37] [TRT] [I] Total Weights Memory: 12727300
[09/11/2025-02:18:37] [TRT] [I] Engine generation completed in 164.86 seconds.
[09/11/2025-02:18:37] [TRT] [I] [MemUsageStats] Peak memory usage of TRT CPU/GPU memory allocators: CPU 1 MiB, GPU 260 MiB
[09/11/2025-02:18:37] [TRT] [I] [MemUsageStats] Peak memory usage during Engine building and serialization: CPU: 2400 MiB
TensorRT: export success ✅ 187.0s, saved as 'yolov8n.engine' (13.8 MB)

Export complete (188.4s)
Results saved to /ultralytics
Predict:         yolo predict task=detect model=yolov8n.engine imgsz=640
Validate:        yolo val task=detect model=yolov8n.engine imgsz=640 data=coco.yaml
Visualize:       https://netron.app
💡 Learn more at https://docs.ultralytics.com/modes/export
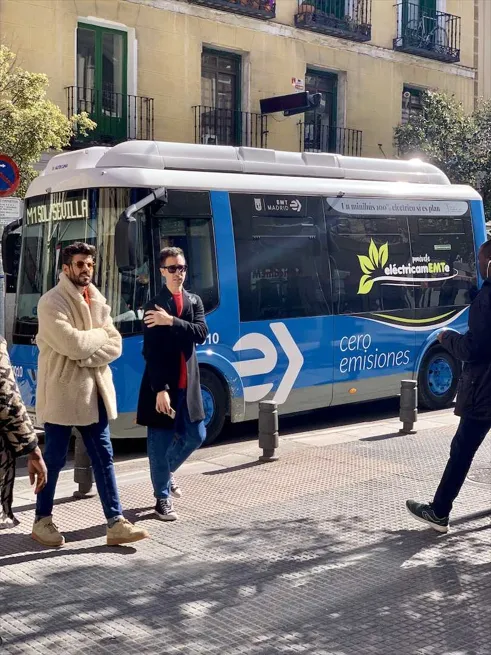
这里在做预测时,先看一下待预测的图片内容,如下
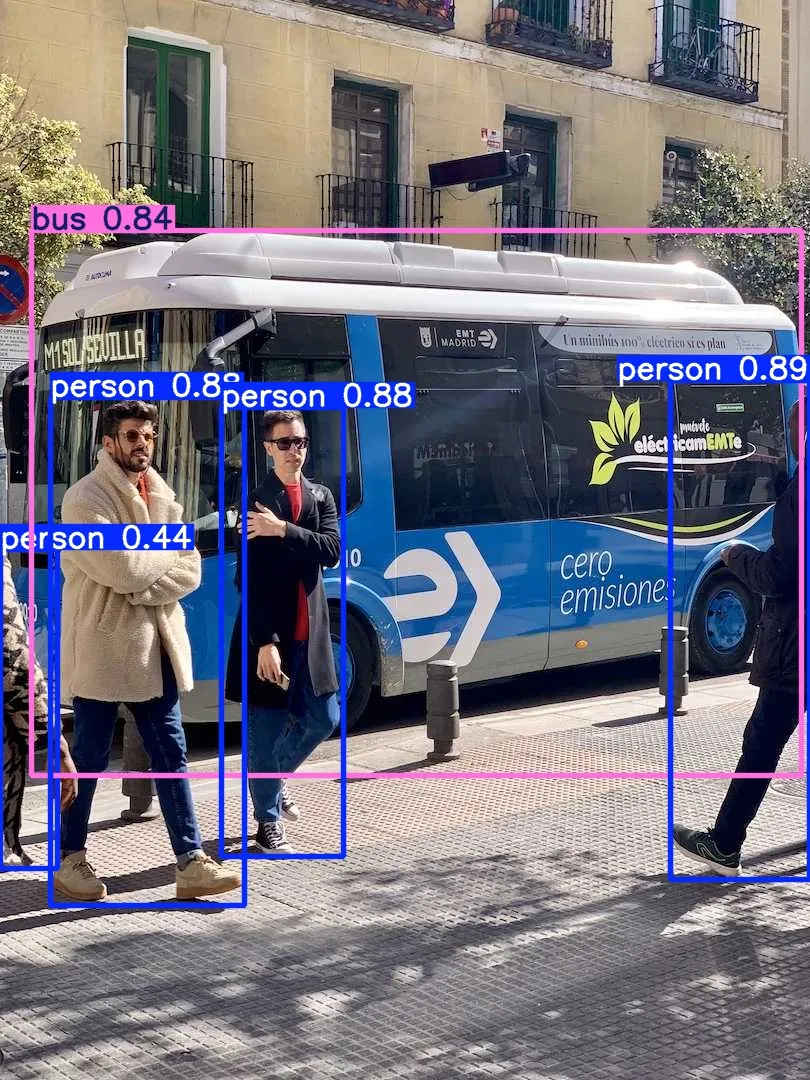
接下来使用这个tensorrt的模型预测,如下
# yolo predict model=yolov8n.engine source='https://ultralytics.com/images/bus.jpg'
运行的日志信息如下
WARNING ⚠️ Unable to automatically guess model task, assuming 'task=detect'. Explicitly define task for your model, i.e. 'task=detect', 'segment', 'classify','pose' or 'obb'.
Ultralytics 8.3.198 🚀 Python-3.10.12 torch-2.5.0a0+872d972e41.nv24.08 CUDA:0 (Orin, 7620MiB)
Loading yolov8n.engine for TensorRT inference...
[09/11/2025-02:21:01] [TRT] [I] Loaded engine size: 13 MiB
[09/11/2025-02:21:01] [TRT] [I] [MemUsageChange] TensorRT-managed allocation in IExecutionContext creation: CPU +0, GPU +18, now: CPU 0, GPU 30 (MiB)

Downloading https://ultralytics.com/images/bus.jpg to 'bus.jpg': 100% ━━━━━━━━━━━━ 134.2KB 1.2MB/s 0.1s
image 1/1 /ultralytics/bus.jpg: 640x640 4 persons, 1 bus, 7.7ms
Speed: 26.9ms preprocess, 7.7ms inference, 130.4ms postprocess per image at shape (1, 3, 640, 640)
Results saved to /ultralytics/runs/detect/predict
💡 Learn more at https://docs.ultralytics.com/modes/predict
可以看到其目标识别的预测值还是非常准确的
ultralytics-yolo webtest
jetson ai lab还提供了webtest,命令也非常简单,首先安装examples包,如下
# venv
# pip install jetson-examples
然后直接运行即可
# reComputer run ultralytics-yolo
INFO: machine[nvidia jetson orin nano engineering reference developer kit super] confirmed...
run example:ultralytics-yolo
----example init----
CONFIG_FILE_PATH=/root/miniconda3/envs/virtual/lib/python3.10/site-packages/reComputer/scripts/ultralytics-yolo/config.yaml
yq is already installed.
jq is already installed.
jq-1.6
32.6.1 35.3.1 35.4.1 35.5.0 36.3.0 36.4.0
L4T VERSION 36.4.4 is not in the allowed versions list.
The JetPack versions currently supported by this container are: 32.6.1 35.3.1 35.4.1 35.5.0 36.3.0 36.4.0.
For more information : https://github.com/Seeed-Projects/jetson-examples
An error occurred. Exiting...
可以看到,examples的仓库没有及时更新,所以不支持36.4.4.这里需要对比一下版本差异。
对于r36.4.0的版本内容,可以如下查阅
文档是
https://docs.nvidia.com/jetson/archives/r36.4/ReleaseNotes/Jetson_Linux_Release_Notes_r36.4.pdf
而对于r36.6.4的版本本容,可以如下查阅
文档是
https://docs.nvidia.com/jetson/archives/r36.4.4/ReleaseNotes/Jetson_Linux_Release_Notes_r36.4.4.pdf
经过确认,相关tensorrt和yolo变化不大,应该可以复用。下面尝试修改jetson_examples的仓库
进入python安装路径,尝试定位到这个判断
/root/miniconda3/envs/virtual/lib/python3.10/site-packages/reComputer/scripts/ultralytics-yolo/run.sh
可以发现其基于config.yaml配置,查看config.yaml,如下
# The tested JetPack versions.
ALLOWED_L4T_VERSIONS:
  - 32.6.1
  - 35.3.1
  - 35.4.1
  - 35.5.0
  - 36.3.0
  - 36.4.0
这里新增一条,如下
# The tested JetPack versions.
ALLOWED_L4T_VERSIONS:
  - 32.6.1
  - 35.3.1
  - 35.4.1
  - 35.5.0
  - 36.3.0
  - 36.4.0
  - 36.4.4
同时,run.sh也做了二次校验判断,如下
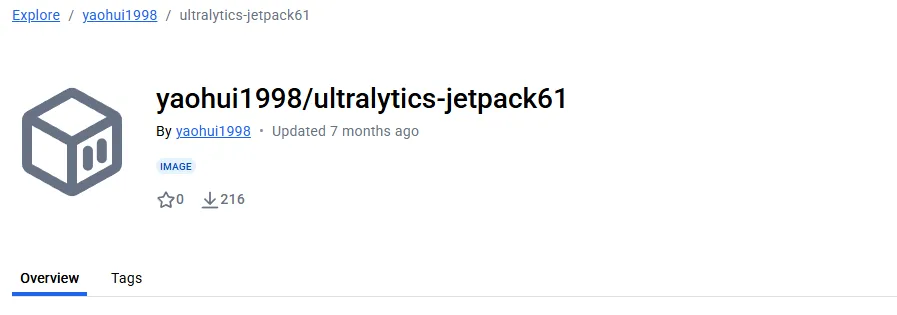
# Determine the Docker image based on L4T version
if [[ "$L4T_VERSION" == "32.6.1" ]]; then
    IMAGE_NAME="yaohui1998/ultralytics-jetpack4:1.0"
elif [[ "$L4T_VERSION" == "35.3.1" || "$L4T_VERSION" == "35.4.1" || "$L4T_VERSION" == "35.5.0" ]]; then
    IMAGE_NAME="yaohui1998/ultralytics-jetpack5:1.0"
elif [[ "$L4T_VERSION" == "36.3.0" ]]; then
    IMAGE_NAME="yaohui1998/ultralytics-jetpack6:1.0"
elif [[ "$L4T_VERSION" == "36.4.0" ]]; then
    IMAGE_NAME="yaohui1998/ultralytics-jetpack61:v1.0"
else
    echo "Error: L4T version $L4T_VERSION is not supported."
    exit 1
fi
新增36.4.4即可,如下
elif [[ "$L4T_VERSION" == "36.4.4" ]]; then
    IMAGE_NAME="yaohui1998/ultralytics-jetpack61:v1.0"
else
这里相当于尝试使用jetpack6.1来在我当前的硬件和内核环境跑yolo
因为yolo主要还是现成的模型来转换,tensorrt版本不变化太大其实没关系。但是是否能跑,现在还打个问号?接下来继续实践
再根据run.sh的docker运行指令,可以知道其启动方式,如下
if [ $(docker ps -a -q -f name=^/${CONTAINER_NAME}$) ]; then
    echo "Container $CONTAINER_NAME already exists. Starting and attaching..."
    echo "Please open http://127.0.0.1:5000 to access the WebUI."
    docker start $CONTAINER_NAME
    docker exec -it $CONTAINER_NAME /bin/bash
else
    echo "Container $CONTAINER_NAME does not exist. Creating and starting..."
    docker run -it \
        --name $CONTAINER_NAME \
        --privileged \
        --network host \
        -v ~/yolo_models/:/usr/src/ultralytics/models/ \
        -v /tmp/.X11-unix:/tmp/.X11-unix \
        -v /dev/*:/dev/* \
        -v /etc/localtime:/etc/localtime:ro \
        --runtime nvidia \
        $IMAGE_NAME
fi
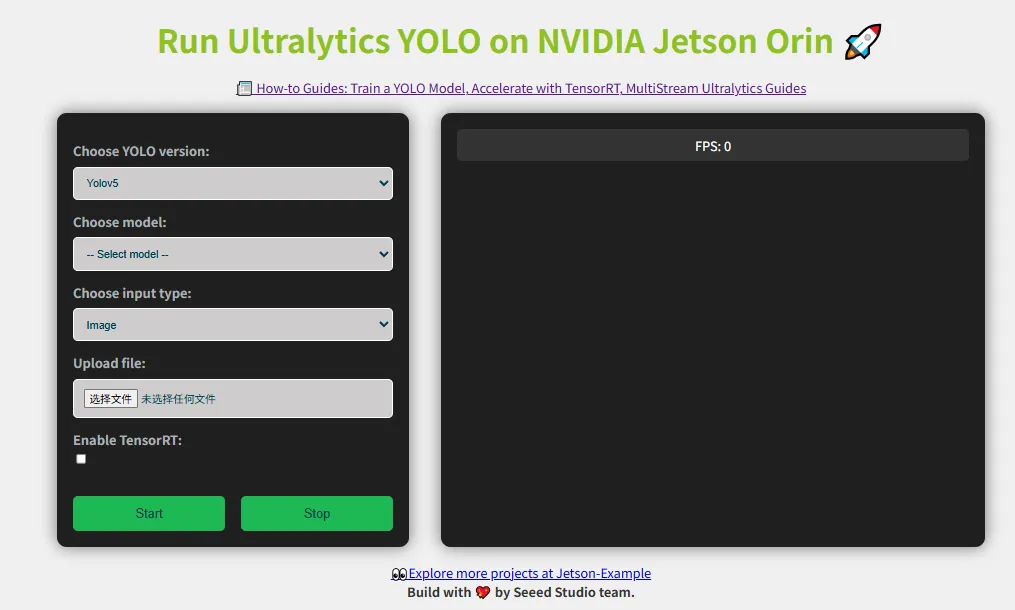
可以看到,第一遍会启动一个名字为ultralytics-yolo的容器,后面每次都是重新打开此容器。默认情况下启动了5000端口作为webui。
docker exec -it ultralytics-yolo /bin/bash
然后进入5000端口,样式如下
yolo on webcam
以webcam做个实验,测试yolov8和yolov10的效果
首先插入双目摄像头,让容器重新加载/dev目录,如下
# docker restart ultralytics-yolo
# docker exec -it ultralytics-yolo /bin/bash
# ls /dev/video*
/dev/video0  /dev/video1  /dev/video2  /dev/video3
然后识别键盘如下
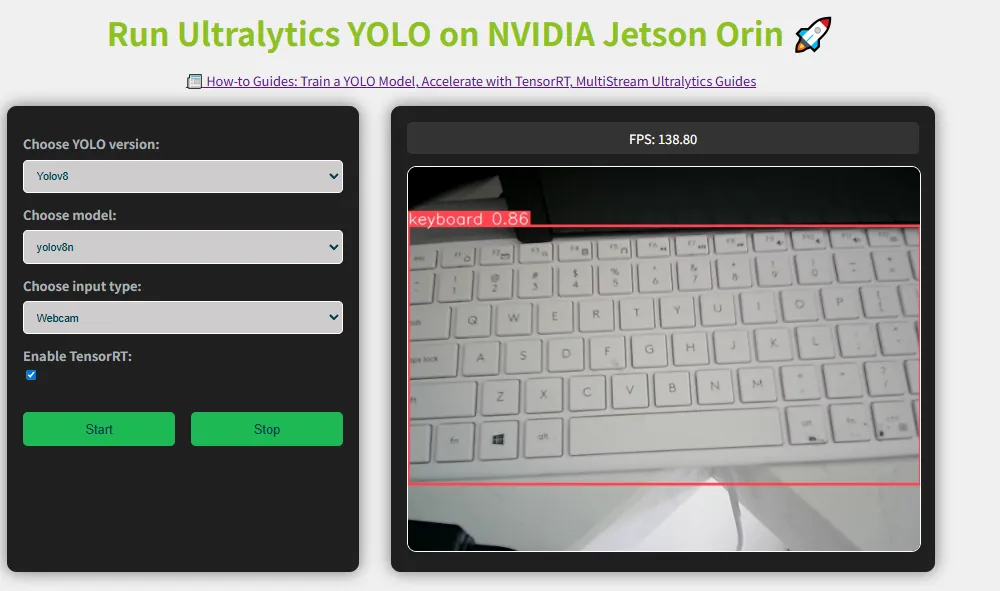
推理日志如下
# docker logs ultralytics-yolo -f
0: 640x640 (no detections), 7.1ms
Speed: 1.9ms preprocess, 7.1ms inference, 1.4ms postprocess per image at shape (1, 3, 640, 640)

0: 640x640 (no detections), 7.1ms
Speed: 1.9ms preprocess, 7.1ms inference, 1.4ms postprocess per image at shape (1, 3, 640, 640)

0: 640x640 (no detections), 7.1ms
Speed: 1.9ms preprocess, 7.1ms inference, 1.3ms postprocess per image at shape (1, 3, 640, 640)

0: 640x640 (no detections), 7.2ms
Speed: 1.9ms preprocess, 7.2ms inference, 1.5ms postprocess per image at shape (1, 3, 640, 640)

0: 640x640 (no detections), 7.3ms
Speed: 2.1ms preprocess, 7.3ms inference, 1.7ms postprocess per image at shape (1, 3, 640, 640)

0: 640x640 (no detections), 7.2ms
Speed: 2.0ms preprocess, 7.2ms inference, 1.5ms postprocess per image at shape (1, 3, 640, 640)

0: 640x640 (no detections), 7.2ms
Speed: 1.9ms preprocess, 7.2ms inference, 1.4ms postprocess per image at shape (1, 3, 640, 640)

0: 640x640 (no detections), 7.2ms
Speed: 2.0ms preprocess, 7.2ms inference, 1.4ms postprocess per image at shape (1, 3, 640, 640)
可以看到orin运行yolo n/s 都比较流畅,不是很吃力

总结
本文基于ai lab的容器内容做了一个实践,简单的在orin上运行了yolo8和yolo11的多个模型。